Exporting Data Sets
|
Exporting Data Sets |
|
|
Accessing and Saving Data > Importing and Exporting Data > Exporting Data Sets
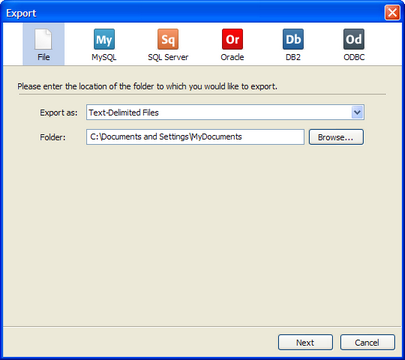
Strata enables you to export data files locally or directly to an external database system (assuming you have write privileges granted by your database administrator). To begin an export process, select Export from the File menu. An Export dialog will appear:
In the top section of the dialog are various types of exports you can perform. For instance, if you wish to export tables as CSV files, you would do this by selecting the File tab and then selecting the export type "text-delimited files" from the drop-down menu. If you wanted to export to your SQL Server database, you would select the SQL Server tab, etc.
Exporting Tables Locally Using Different File Types
When you select the File tab at the top of the Export dialog, you should first choose what type of file you want to export. You can select:
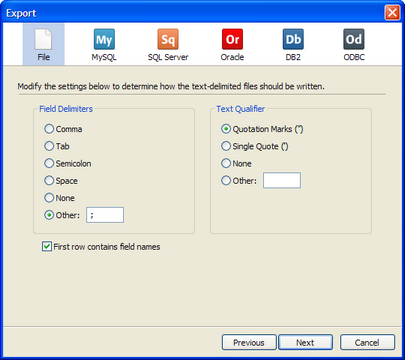
For text-delimited, fixed-length and DBF types, you then need to select the Folder on your computer where you want the files exported. Then, for text-delimited types, you'll need to set your delimiter and qualifier prior to export:
On the left, select your delimiter. If you have a custom delimiter, such as pipe-delimited or semi-colon delimited, select the Other option and enter in your delimiter. Similarly, select the appropriate text qualifier and whether you'd like to export field names with your file as the first row. Once the delimiters are selected, click the Next button to proceed.
For MDB, XLS and KPG, you need to select a file name and path for the exported files (since, unlike single text files, these three formats can contain multiple tables per individual file). Once you select these options, click the Next button.
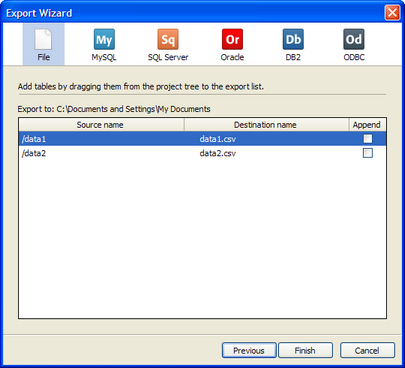
This screen is the same for all file types. It enables you to select the tables you wish to export. Simply drag the files from the project panel into this dialog to ready them for export. There are three settings on the screen:
As an example of appending files during an export, let's say that you had three CSV files (each having the same structure) named CSV1, CSV2 and CSV3, respectively, that you wanted to add to an existing table called MAIN on your local hard drive. On the first page of the Export, you would select the path and/or filename of the file you wish to append to. Then, you would select each of the files, change each of their destination names to "MAIN" and check the Append checkbox.
Once you have configured your export options, press the Finish button and the files will be exported to the path you chose in the previous page.
NOTE: For export to Microsoft Excel and Access, at this time, Strata can only export as XLS and MDB files, respectively. If these legacy Microsoft and Access formats are not suitable, we recommend exporting as a comma-delimited (CSV) text file.
Exporting Tables to External Database Systems
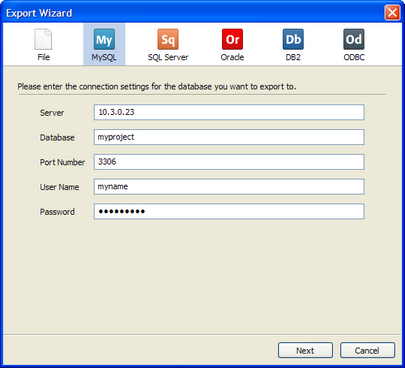
You may also export tables directly to external database systems, such as MySQL Enterprise, Microsoft SQL Server, Oracle, and IBM DB2. You may also export to other systems using an ODBC driver (assuming, of course, you have the proper write permissions). To export to an external system, select the appropriate tab on top of the Export dialog and you will get a connection page.
To connect to the database, enter the connection information and then click the Next button. The required connection information is as follows:
If a connection is made, you will be taken to the Export settings page as discussed above.
NOTE: The option to export to MySQL, Oracle, SQL Server, DB2 and other database systems may first require the installation of appropriate database drivers. For example, you may need to download and install the MySQL Connector/ODBC driver for MySQL or the Oracle Call Interface (OCI) driver for Oracle. Please contact your system administrator for further information. Third-party drivers are in no way affiliated with Strata or its licensing agreement. Please contact the third-party providers of these drivers for further information on licensing and usage terms.
|